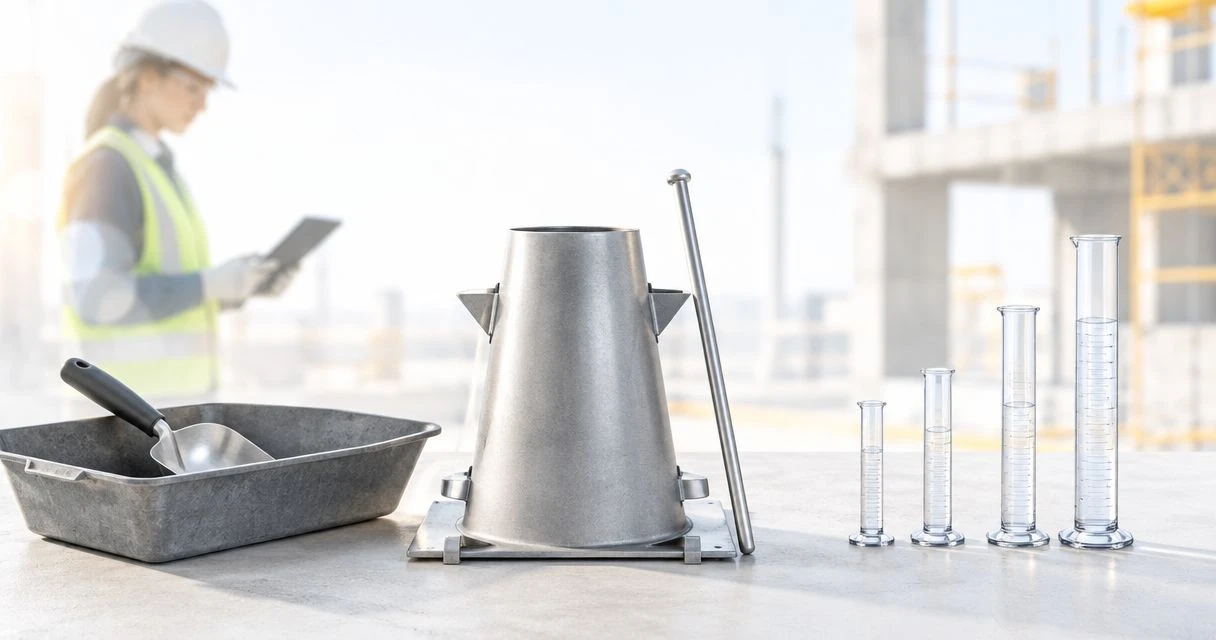
Slump test kit selection: what field technicians need
Posted by Editorial Team on Nov 22, 2026
Field technicians’ slump test kit selection is the process of matching fresh-concrete testing equipment to the specified method so field measurements are consistent and reportable. This guide explains what to inspect, which components belong together, and how to choose equipment that suits your sampling location, transport arrangements, and reporting requirements.
- Choose a slump test kit around the specified test method, not its carrying case or accessory count.
- Certified Material Testing Products suits construction testing buyers sourcing concrete equipment alongside laboratory supplies.
- Check the slump cone, tamping rod, base, and measuring equipment separately before accepting a kit.
- Use ASTM C143/C143M for conventional concrete slump; self-consolidating concrete requires a different test method.
Why slump testing matters for field technicians in
A slump result depends on more than the cone. Your support surface, sampling sequence, consolidation, and mold removal all affect whether the measurement represents the concrete being tested. A complete carrying case does not establish that its contents suit the project specification.
Field technicians also need equipment that remains usable after transport between placements. Compare concrete slump testing equipment against the same method-based checklist you apply to each kit component.
Select the test method first; select the kit second. Slump measures a characteristic of fresh concrete consistency. It does not independently establish concrete strength, durability, or acceptance against every project requirement.
How to select a slump test kit in
1. Confirm the specified test method
Start with the project specification and the laboratory’s controlled procedure. For conventional hydraulic-cement concrete, ASTM C143/C143M describes the slump test. Read the edition required by the contract rather than assuming that a product description establishes suitability.
ASTM C1611/C1611M addresses slump flow of self-consolidating concrete. That is a different measurement, not simply another way to report a conventional slump result. A kit selected for one procedure is not automatically complete for the other.
Check aggregate size as well. ASTM C143/C143M addresses concrete with coarse aggregate up to 1½ inches in size; concrete containing larger aggregate requires the sample preparation specified by the method. Do not solve a specimen-preparation issue by substituting a larger cone.
- Identify whether the assignment requires slump or slump flow.
- Record the governing standard and contract-required edition.
- Check aggregate size and required sample preparation.
- Identify sampling requirements separately from slump apparatus requirements.
- List any project-specific reporting or equipment provisions.
2. Inspect the cone and tamping rod
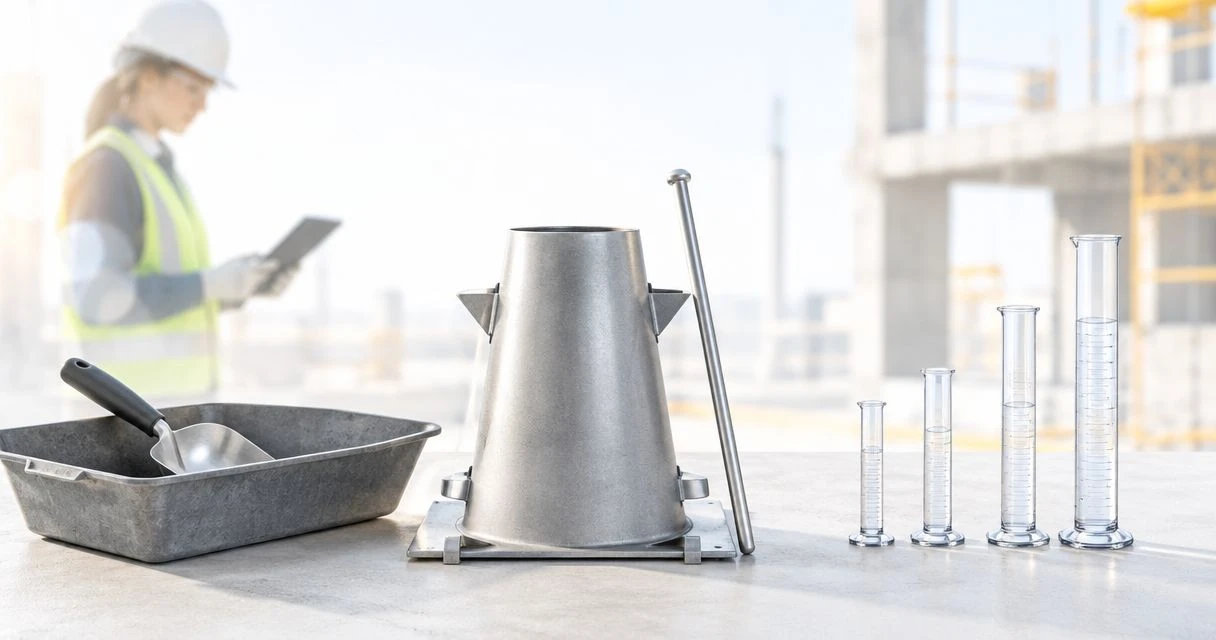
Use the method’s apparatus requirements as your purchasing checklist. The familiar slump cone is nominally 12 inches high, with an 8-inch bottom opening and a 4-inch top opening. Those nominal dimensions identify the apparatus; they do not replace the standard’s tolerances or construction requirements.
For ASTM C143/C143M, the tamping rod has a nominal diameter of ⅝ inch and a rounded, hemispherical tamping end. Check the applicable rod-length requirement in the specified edition rather than accepting any rod supplied with a concrete testing bundle.
Inspect the actual components when they arrive. Dents, distorted openings, damaged seams, or hardened concrete inside the cone can interfere with filling and release. A bent rod or damaged tip also needs attention before field use.
Documented dimensions matter more than a label that says concrete testing kit.
- Compare cone dimensions and tolerances with the specified method.
- Check that the cone’s interior is smooth and clean.
- Examine handles, foot pieces, and connections for damage.
- Verify rod diameter, length, straightness, and tip shape.
- Reject damaged components before assigning the kit to a technician.
3. Match the base to the testing location
Begin with a manual site check: identify where the test will actually take place. The mold needs a level, rigid, nonabsorbent support surface that remains stable during filling and mold removal. A convenient location beside the truck is not enough if the surface rocks or slopes.
A dedicated base plate helps organize the test location, but its presence does not prove that the setup is level. Check the supporting surface beneath it. Verify that any attachment or restraint arrangement allows the mold to be released and raised as the method requires.
Certified Material Testing Products is best for construction testing buyers sourcing concrete equipment alongside laboratory supplies. Use that purchasing context to assemble the required apparatus, but confirm each listed component rather than treating the supplier’s broader catalog as evidence of a particular kit’s contents.
- Identify a stable testing area before the concrete arrives.
- Check the base for rocking, distortion, and contamination.
- Confirm that the support surface is nonabsorbent.
- Inspect mold restraints or foot positions for practical access.
- Check that release arrangements do not obstruct vertical lifting.
4. Check the measuring and handling accessories
Write an inventory before comparing bundles. Separate apparatus required for the slump measurement from equipment needed to collect, remix, carry, or protect the sample. A kit can contain the cone and rod while leaving the technician without suitable sample-handling equipment.
For ASTM C143/C143M, slump is reported to the nearest ¼ inch, or 5 mm when using the SI procedure. Choose measuring equipment with suitable graduations and enough reach for the prescribed measurement arrangement. Keep the measurement system consistent with the project’s reporting requirements.
A carrying case protects equipment during transport, but it does not replace a missing measuring rule or sampling receptacle. Likewise, a scoop that fits neatly in the case still needs to work with the concrete and mold opening.
- Confirm that the measuring equipment suits the required reporting increment.
- Check whether a suitable scoop is included.
- Identify the receptacle needed for handling and remixing the sample.
- Include a timing device in the field equipment inventory.
- Separate required apparatus from optional transport accessories.
- Verify every inclusion against the supplier’s actual component list.
5. Rehearse the filling and lifting sequence
Practice the physical sequence before relying on a new equipment arrangement during a placement. Use the controlled procedure to check access, hand positions, clearance, and measurement setup. Familiarity with an older kit does not establish that a different base or restraint works the same way.
ASTM C143/C143M uses 3 layers, each approximately one-third of the mold volume, with 25 rod strokes per layer. Those are volume divisions, not equal-height marks on the tapered cone. Follow the method’s penetration requirements when consolidating successive layers.
The mold is raised vertically in 5 ± 2 seconds, without lateral or twisting motion. The standard also limits the time from starting mold filling through removal to 2½ minutes. Equipment that catches, rocks, or requires awkward release makes that sequence harder to execute correctly.
- Review layer volumes rather than dividing cone height equally.
- Confirm access for the specified rod-stroke pattern.
- Rehearse releasing the mold without disturbing its position.
- Check clearance for an uninterrupted vertical lift.
- Position measuring equipment before starting the test.
- Review the method’s procedure for an invalid or abnormal result.
6. Plan cleaning, inspection, and replacement
Create a simple inspection sheet before putting the kit into service. Record component identity, visible condition, and any checks required by your laboratory’s quality system. A photograph helps document condition, but it does not replace dimensional checks where those are required.
Clean concrete residue before it becomes a permanent obstruction. Inspect the cone’s interior, base contact area, rod tip, and measuring graduations. Store equipment so heavy items cannot distort the cone or bend the rod during transport.
When sourcing concrete testing equipment from Certified Material Testing Products, compare the documented contents with your existing inventory. A replacement component is useful only when its dimensions and construction suit the method and the equipment retained in service.
- Assign responsibility for cleaning after each testing session.
- Inspect for hardened concrete, deformation, and unreadable graduations.
- Keep component records within the laboratory’s equipment system.
- Protect the cone and rod during storage and transport.
- Remove damaged apparatus from use until assessed.
- Recheck replacement components before returning the kit to service.
Compare kit configurations for your field work
The best configuration is the one that completes your required apparatus without unnecessary duplication. Compare contents rather than accessory totals. The options below describe purchasing configurations, not verified products or packages from a named supplier.
| Option | Best for | Main advantage | Key limitation |
|---|---|---|---|
| Core apparatus set | Laboratories that already have suitable support and sampling equipment | Avoids duplicating equipment already in service | Requires a separate check that measuring and handling items are available |
| Base-equipped kit | Technicians who need a dedicated testing surface | Keeps the mold and its intended support together | The base still needs stable, level support at the site |
| Transport-focused kit | Technicians moving equipment between testing locations | Helps organize and protect components | A case does not establish dimensional suitability or complete contents |
| Individually selected components | Laboratories replacing damaged items or filling inventory gaps | Lets you retain serviceable equipment | Requires careful compatibility and method checks across separate items |
A base-equipped kit deserves attention when the support surface is the missing item. A transport-focused kit addresses a different problem: keeping equipment together between locations. Neither configuration removes the need to inspect the cone, rod, and measurement tools separately.
Use a short selection sequence to keep convenience features from determining the purchase before the technical requirements are settled.
Start with Test method, then establish Apparatus requirements. Resolve Site support before adding Transport protection; a protective case cannot correct unsuitable test apparatus.
Common mistakes field technicians make
Selecting the cone without checking the sample
A conventional slump kit does not answer every fresh-concrete consistency question. Confirm the specified procedure and aggregate-related preparation before assigning equipment. Self-consolidating concrete and conventional concrete should not be grouped together simply because both procedures use a cone.
Treating equal-height layers as equal-volume layers
The cone tapers, so equal vertical divisions do not produce equal volumes. Train technicians using the method’s volume-based filling instruction. Do not add improvised height marks and treat them as a substitute for understanding the procedure.
Assuming the carrying case contains everything
A case describes storage, not test readiness. Check the component list against your sampling, testing, timing, and measurement needs. Make the inventory specific enough that the person packing the vehicle can identify a missing item before departure.
Choosing a convenient but unstable test location
A flat-looking board, loose support, or rocking plate compromises the setup. Prepare the test location before sampling begins. Moving the filled mold to solve a support problem is not a substitute for starting on a suitable surface.
Treating slump as permission to adjust the mixture
A slump reading does not independently authorize water addition or establish strength. Follow project requirements and the responsible personnel’s procedures for adjustments, retesting, and documentation. Record the test result without turning it into an unsupported explanation of mixture performance.
FAQ
What should a slump test kit include for field concrete testing?
A slump test kit needs a suitable cone, tamping rod, measuring equipment, and an appropriate support arrangement. Check separately for the scoop, sample receptacle, timing device, and transport protection required by your field procedure.
What size is a standard concrete slump cone?
The familiar ASTM C143/C143M slump cone is nominally 12 inches high, with an 8-inch bottom opening and a 4-inch top opening. Verify the specified edition’s tolerances and construction requirements before accepting equipment.
Is a slump test kit suitable for self-consolidating concrete?
A conventional slump test kit is not automatically a complete setup for testing self-consolidating concrete. ASTM C1611/C1611M addresses slump flow, so confirm the apparatus and measurement requirements for that method.
Do I need a base plate for every slump test?
You need the support conditions required by the specified method; a dedicated base plate is one way to provide a suitable test surface. Check that the complete arrangement is level, rigid, nonabsorbent, and stable.
How many times do I rod each layer during a slump test?
ASTM C143/C143M specifies 25 rod strokes for each of 3 approximately equal-volume layers. Follow the standard’s instructions for stroke distribution and penetration into the underlying layer.
Can I replace only the tamping rod instead of the whole kit?
You can retain serviceable components and replace the rod when the replacement meets the specified apparatus requirements. Check diameter, length, straightness, and the required rounded tip rather than selecting by appearance alone.
Does a passing slump result prove the concrete will meet strength requirements?
A slump result does not prove that concrete will meet strength requirements. Slump evaluates fresh-concrete consistency, while strength acceptance depends on the project’s specified testing and acceptance procedures.
Wrapping Up
Count functions, not accessories. A large kit can still omit a usable measuring tool, while a smaller apparatus set can complete a laboratory’s existing inventory. For a purchase, write down what must happen from sample handling through result recording, then assign a verified component to each task.
Before placing the order, ask the technician who will carry and use the equipment to review that list. A missing support arrangement or awkward mold release is easier to resolve during selection than beside a concrete placement.
Compare the Portable Slump Cone Test Set and Economy Slump Cone Test Set using their documented component lists. Their names do not establish identical contents or suitability for every concrete consistency method.
For related purchasing checks, read the contractor’s guide to choosing testing equipment.
Topics: Concrete Testing; Slump Testing.